Hi friends! Today I’m excited to share a client project we just installed. We worked on the client’s master bedroom and the transformation is too good to be true! Follow #CIDMoodyBlue on Instagram to see all the posts.
“Cristina was thoughtful in her use of space and design ideas, incorporating some personal items as well as gently pushing my boundaries into a new design of my space I’m just thrilled to be in.”
Client profile:
At the beginning of the project, the client was excited but unsure about where she wanted to end up with the room, design wise. I sent her my online questionnaire and she added her favorites styles, room measurements and other specifications. To further determine her design style, I started with some Design Inspiration pictures to get some initial feedback. Next up, was a consultation via Zoom conference call.
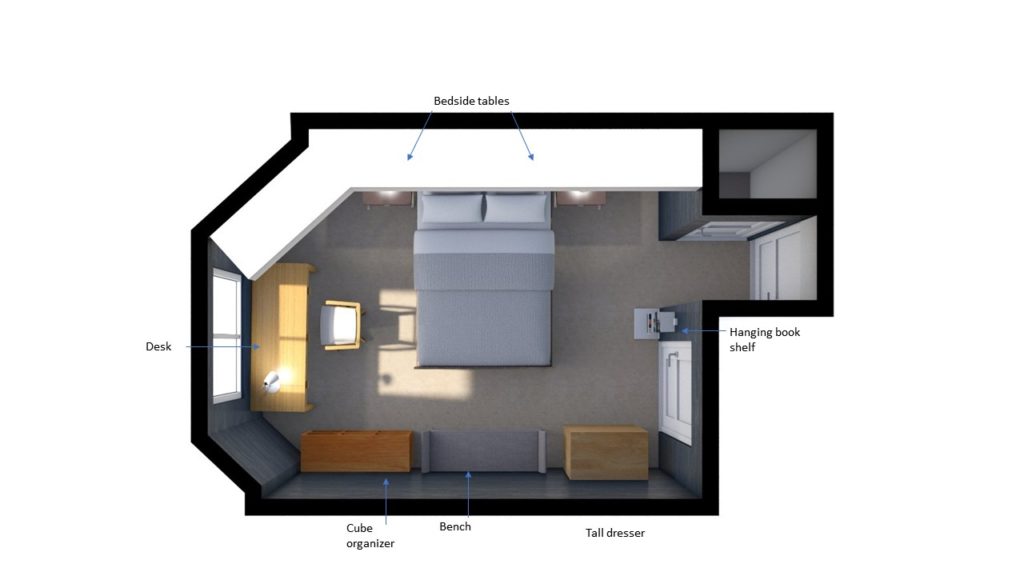
I also sent her the floor plan with the furniture layout I was proposing to get her feedback.
“I think the back and forth details at the end of the questionnaire and before the preliminary design was most helpful – to get to the level of personal style detail to create the final design the really reflects the client.”
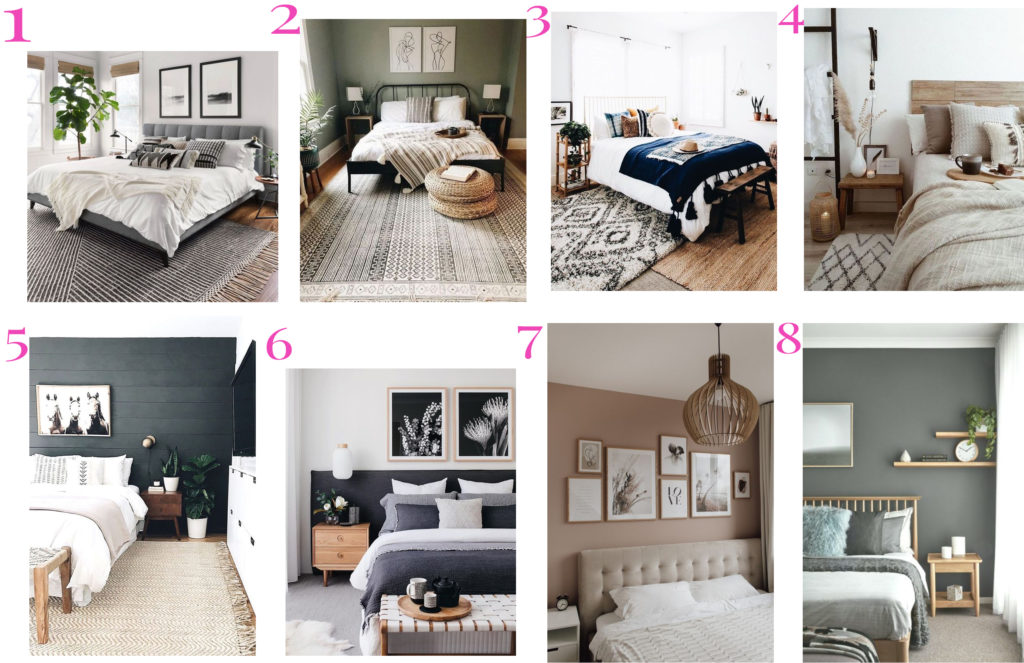
Two Idea Boards:
I always like to present two idea boards to clients so I can get a better idea of their style. Style is such a personal thing, even when we think we know what we want, we need to envision it and it helps us understand what we really want in a space.
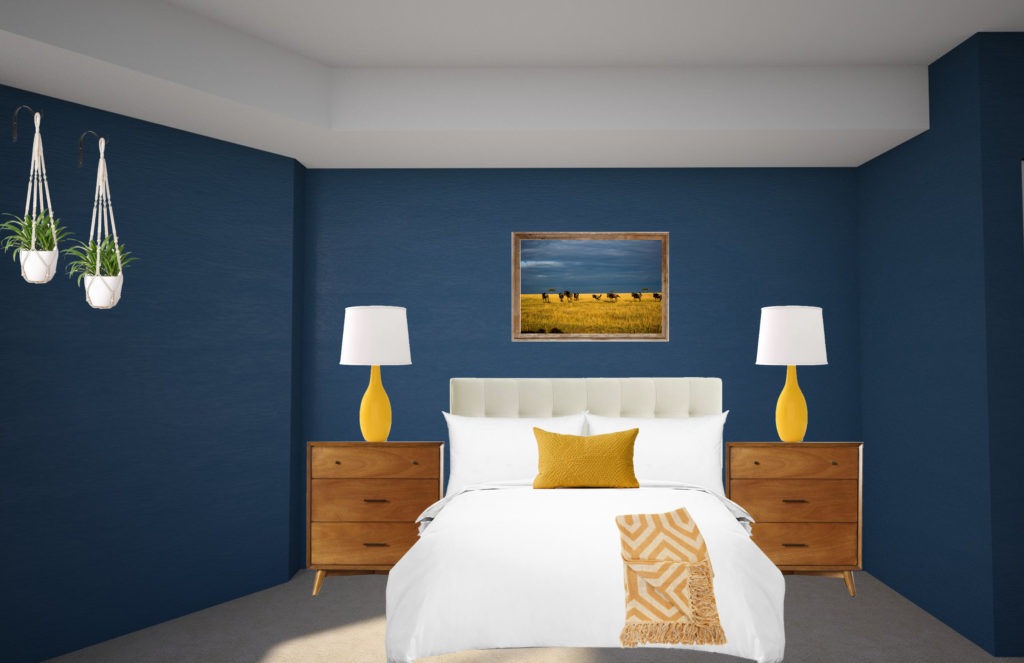
Moody Blue Haven
The first Idea Board I called Moody Blue Haven. With this design we would keep the gray blue color she already had and add some warm wood elements and yellow tones throughout to lighten the space and we would pair it with cool black and white art throughout. Since the client is a photographer, I also asked if she had any preferred photograph for over the bed instead of me selecting one for her.
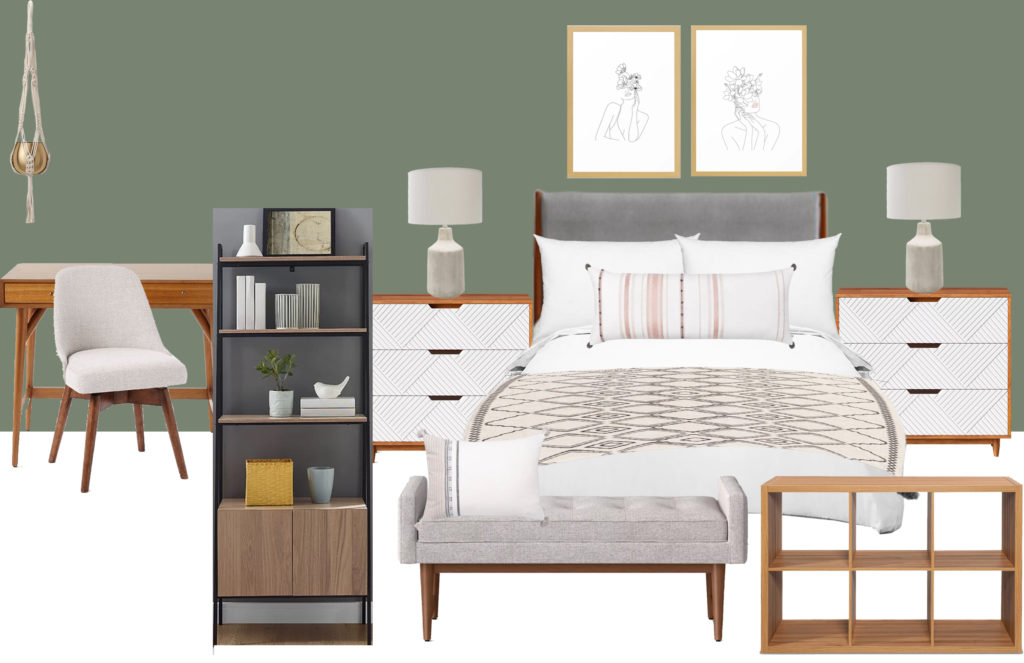
Soft & Sage Idea Board
For the second idea, which I called Soft and Sage, I incorporate a beautiful sage tone on the walls to replace the blue paint, based on her feedback during the inspiration phase. To complement the sage, I added some blush, grays and whites, for a soft color palette. I also added some feminine line art for over the bed.
Concept:
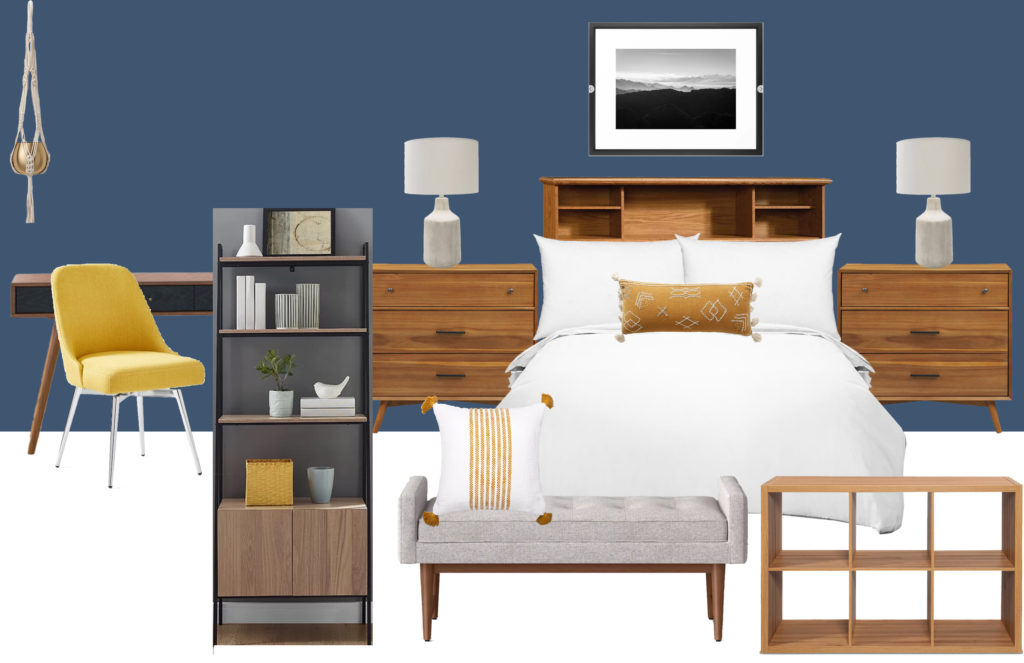
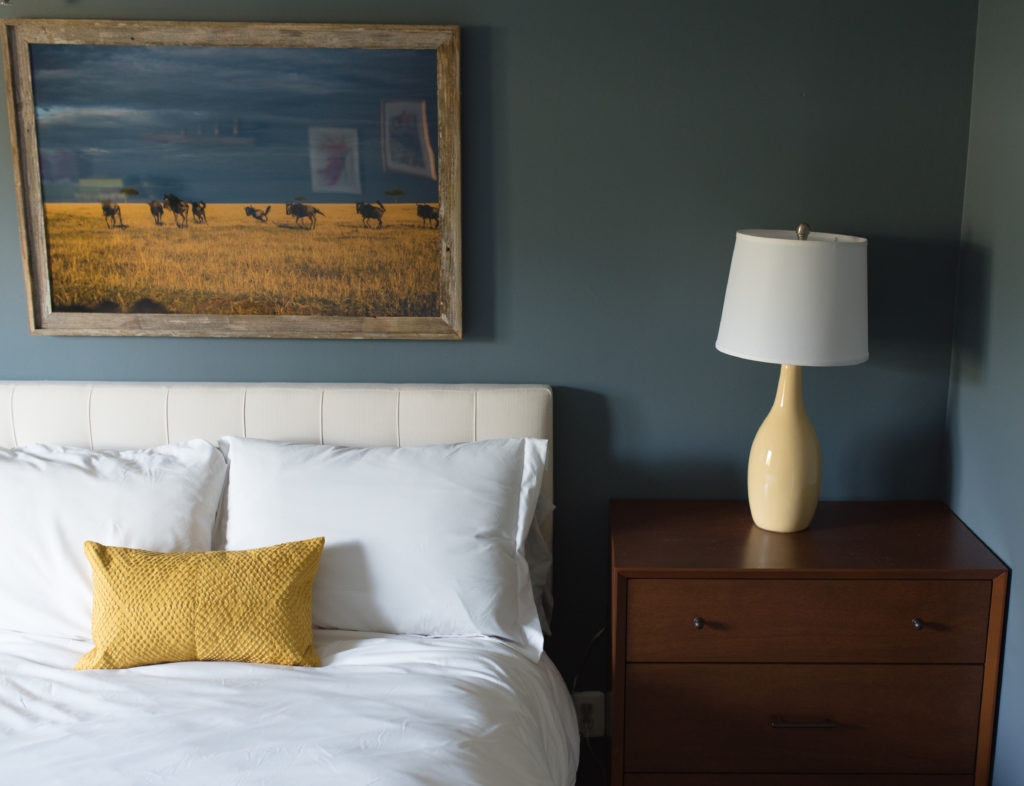
Since the client was loving the moody blue design and had little edits, we moved forward with scheduling a Zoom call to discuss in detail. She has a lot of books so I had a bookcase to contain her books but she actually wanted to get rid of many books and she liked the asymmetrical shelves of one of the inspiration pictures, so discussed adding shelves. She also sent me a few of her favorite landscape photographs she had taken on her trips for me to choose from for her design and once I saw them, I knew which one would be PERFECT.
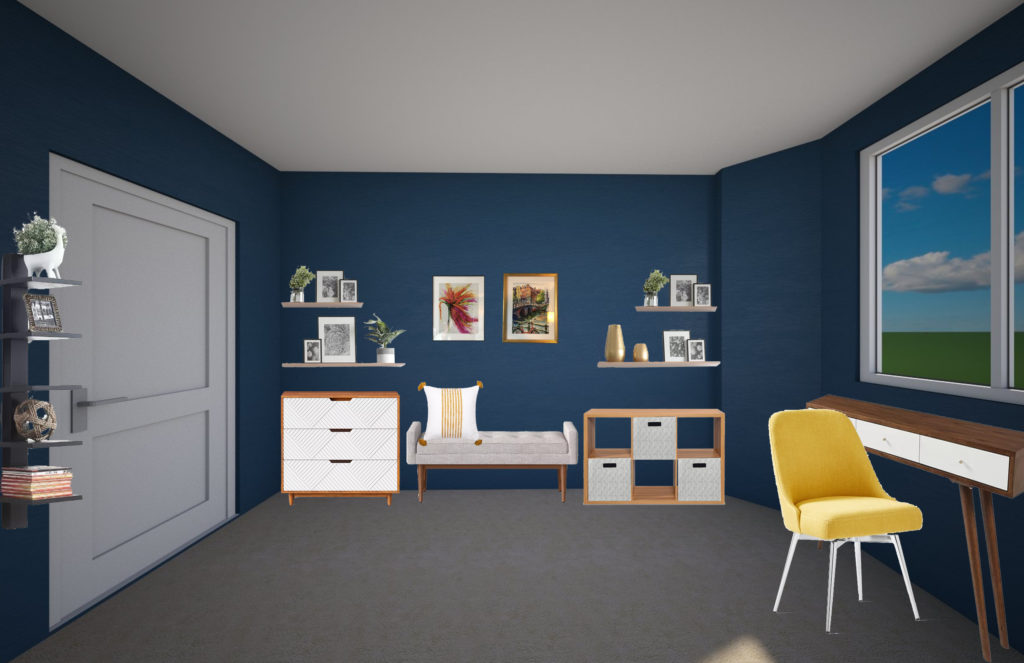
Final Design:
Finally, I put together the renders for Sarah’s final design. Her reaction? “This is so cool!”
Shopping Links:
The great thing about online interior design is that it gives my clients the autonomy to set up their room themselves on their own time. Once we finalized the design, my client immediately purchased all the furniture. (Well Covid slowed us down a little bit, but eventually everything arrived!) Sarah and I had already discussed that she wanted our help with the project installation, so once the furniture was mostly in, we scheduled time to do the install.
“It’s truly special to see the work on the designs come to life.”
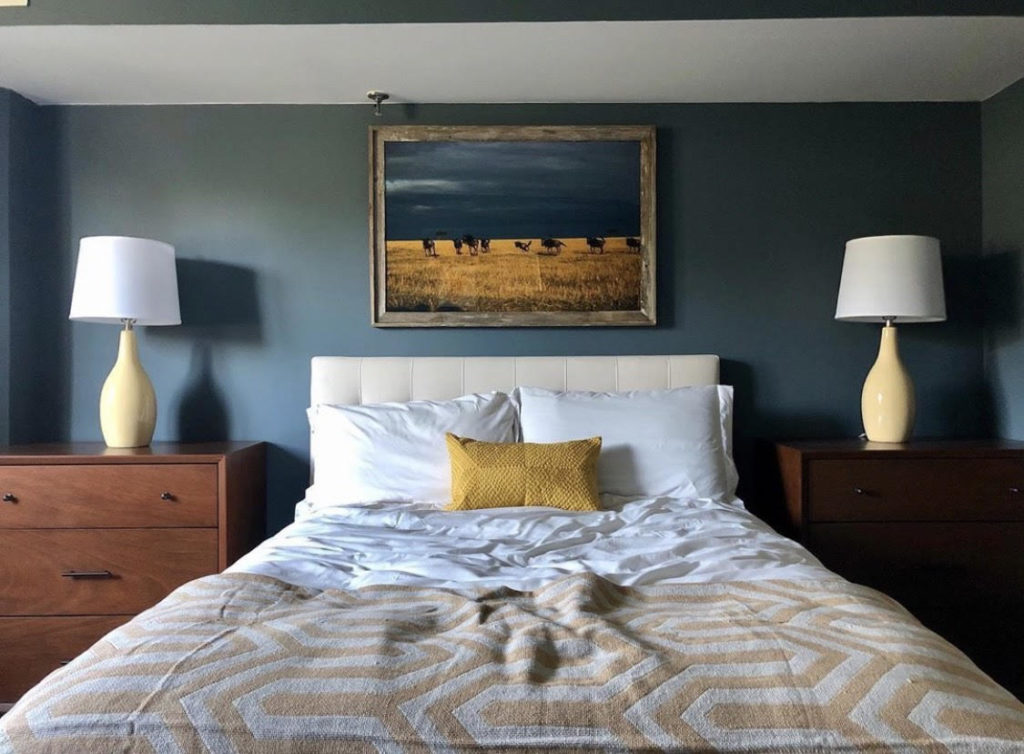
In-Person Installation:
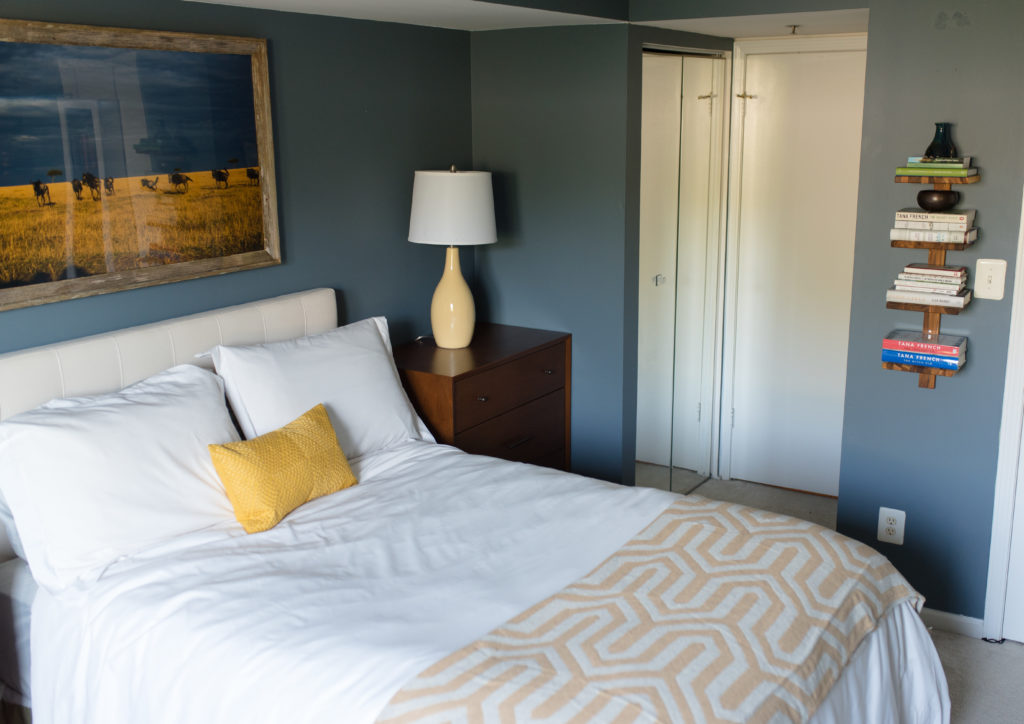
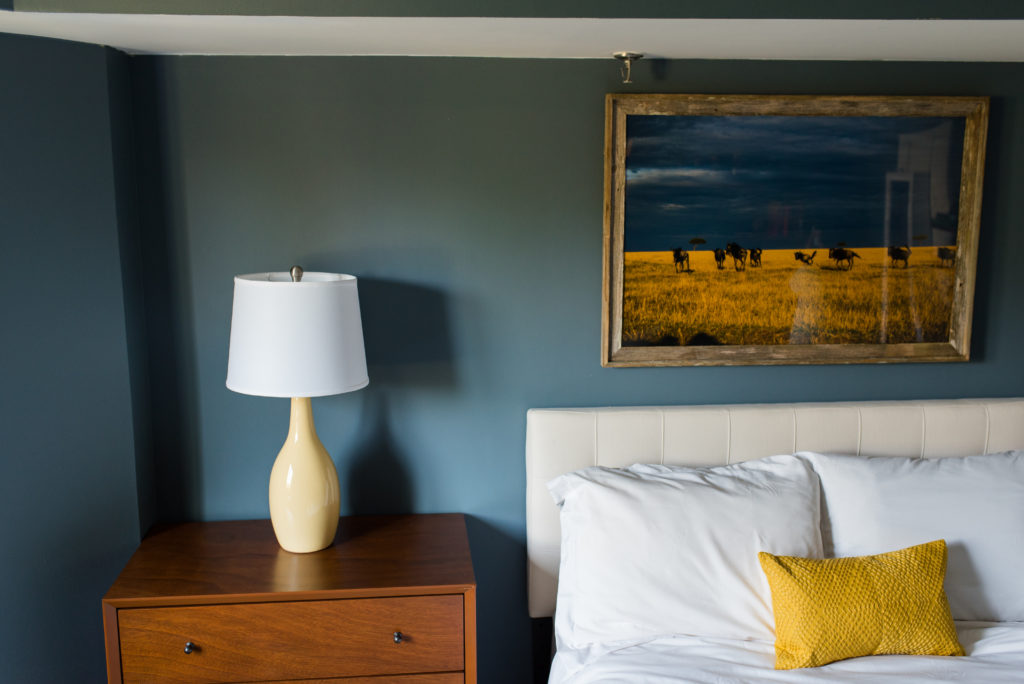
The client and I met in early July to install her space along with two handymen on my team. We started with the dressers, which actually came built, making the process a lot easier. Then the old headboard was removed and the new one was installed. As soon as I saw the new headboard, I knew the transformation was going to be amazing!
Next I helped the handymen with the alignment of the frame over the bed. Pro Tip: Use painter’s tape to mark the top and bottom of where you want to hang the art, then mark where to drill the holes in the wall. It makes the process much easier!
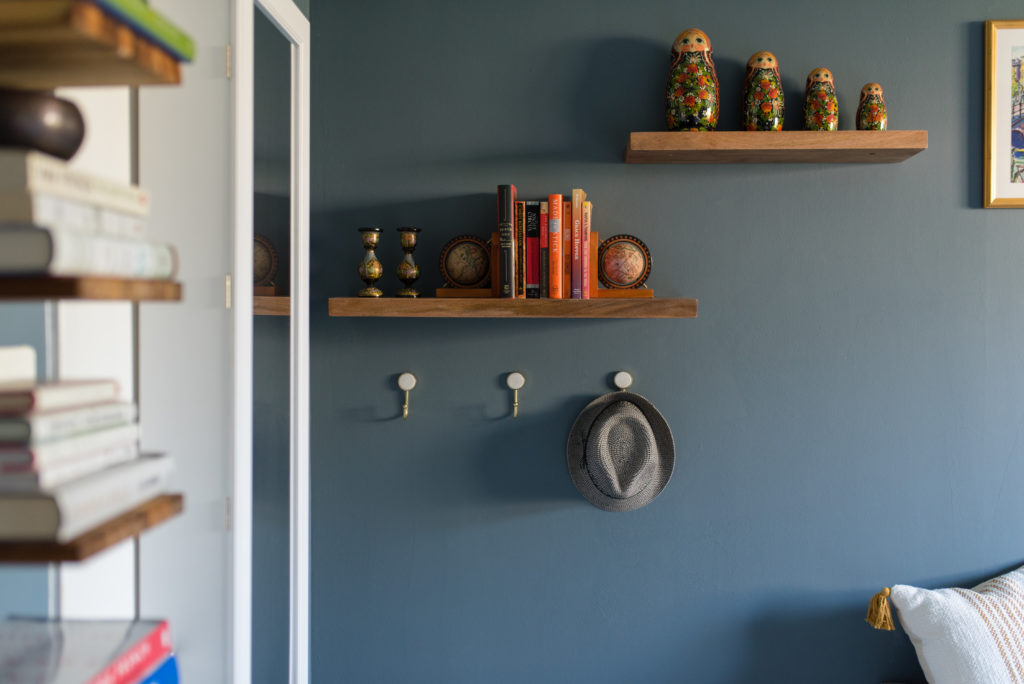
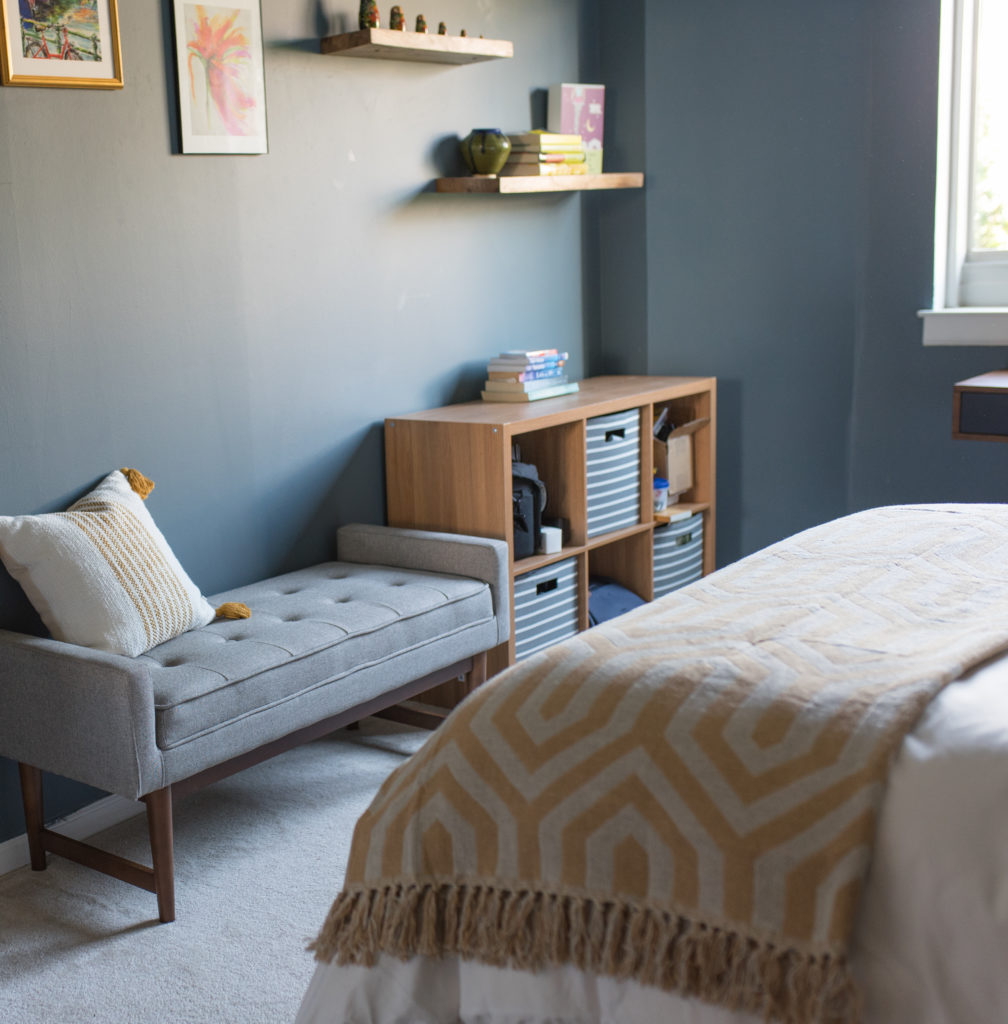
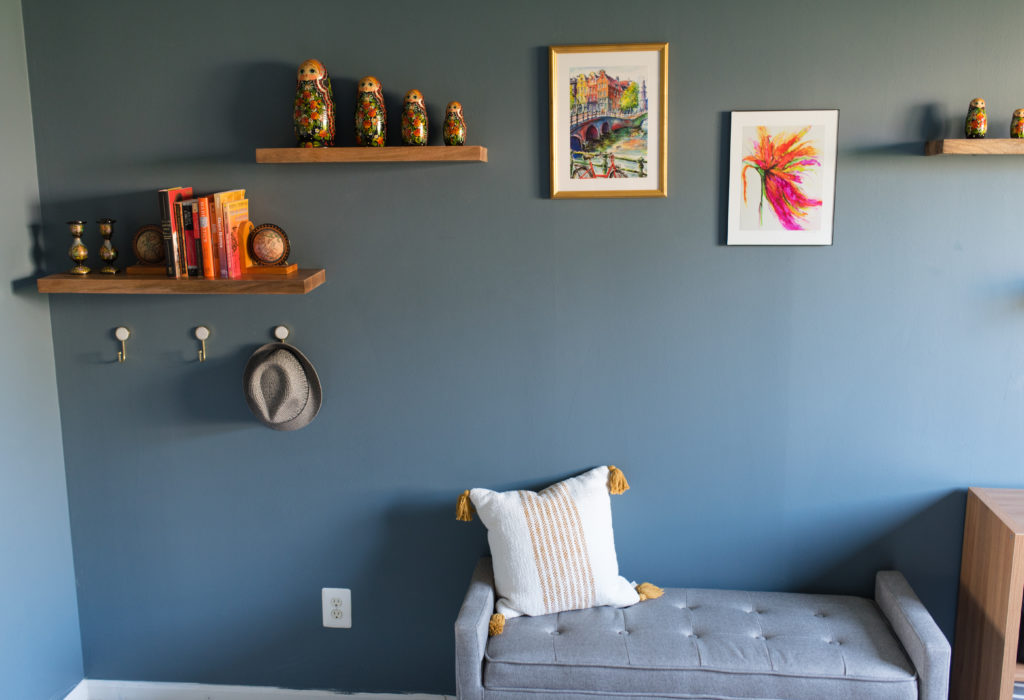
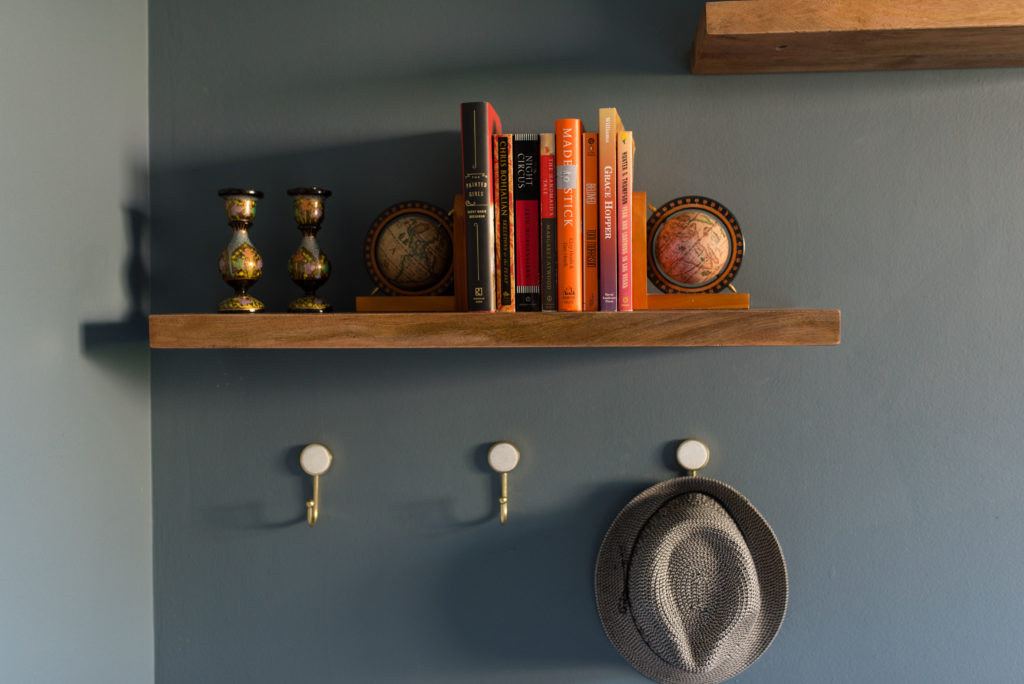
Then we got to work on the opposite wall. I marked out where the asymmetrical shelves should go and the handymen got to work installing them. Once the shelves where hung, I worked with the client to find interesting items around her apartment to style the shelves. She loves to travel and read, so I found many books and great travel artifacts, like these Russian dolls! It was such a perfect way to display them!
The client was thrilled with her new bedroom space! What she thought of her first night in the room? “So nice! Luxurious almost!” Just what I like to hear! Take a look at some of the other pictures and scroll down for the Before and After!

Interested in updating your master bedroom to make it a more comfortable and cozy space? Let’s work together to make it happen. Have questions? Email me at hello@cristinaisabeldesign.com.


[…] for a repeat client that wanted a calming, neutral space for their boys to play and do homework. We converted an un-used bedroom into a space loved by the kids! Make sure to scroll to the end to see the Before and After […]